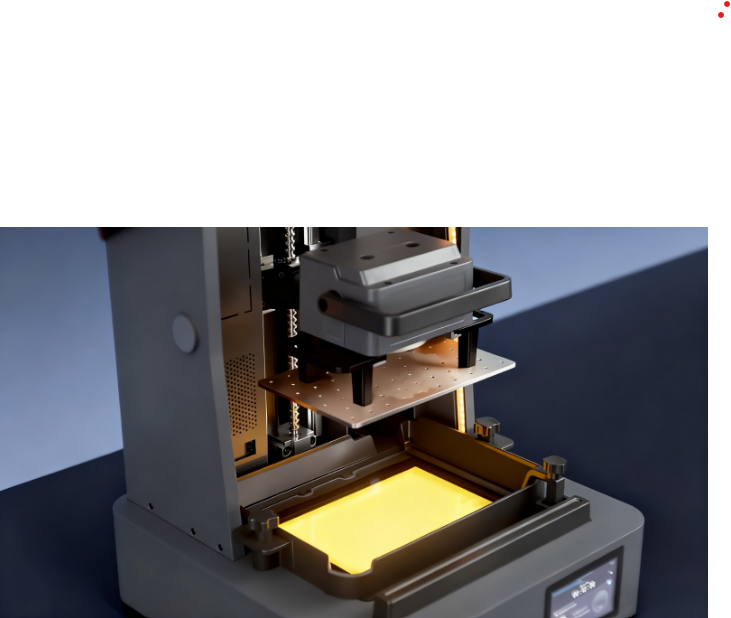
Time-lapse photography compresses the hours-long—or even day-long—dimension of a single print job into a dynamic sequence lasting just seconds or minutes. It visually reconstructs the entire process from liquid resin to solid form. For product design, educational training, process evaluation, and marketing, these fluid visuals are not only aesthetically pleasing but also help observers understand the curing process, material properties, and equipment stability.
However, the resin 3D printing environment is unique: UV activation, chemical odors, potential contamination from powders and liquids, and subtle fluctuations in internal temperature, humidity, and light sources all impact the stability and image quality of time-lapse footage. Therefore, developing a scientific, systematic shooting plan that balances visual aesthetics with operational safety is key to achieving high-quality results.
Theoretical Framework and Key Parameters
Shooting Goals and Stylistic Approach
When selecting the Interval and total duration, one must consider observable milestones in the part’s lifecycle, such as initial adhesion, layer-by-layer curing, surface shrinkage, and support formation. A common practice is to record these key stages at consistent intervals and then adjust the pacing during post-production to create a seamless narrative from start to finish.
Camera Layout and Lighting Control
The camera angle must remain absolutely stable; avoid any micro-movements of the camera setup during the printing process, as these lead to jittery footage. Lighting should be uniform and shadow-free, avoiding reflections that cause overexposure or underexposure. It is generally recommended to use a combination of soft light sources, directional lamps, and lens hoods to minimize the impact of light fluctuations on color and exposure consistency.
Equipment and Material Safety and Compliance
Time-lapse photography is not just about visual effects; it must also account for onsite ventilation, waste liquid disposal, and personal protection. Ensure that filming does not interfere with the printer’s normal heat dissipation or maintenance, and strictly follow the operational guidelines in the Safety Data Sheet (SDS). If the project involves highly regulated fields like medical or jewelry, strict adherence to relevant safety and compliance requirements is mandatory.
System Guide for Equipment and Software Selection
Principles of Equipment Selection
- Camera Type: High-resolution webcams or DSLR/mirrorless cameras can capture high-quality images. However, ensure the frame rate and data stability are suitable for long-duration recording. If the budget is limited, prioritize models with stable manual focus, good low-light performance, and consistent color temperature.
- Stability and Anti-Shake: Use a tripod or a dedicated rig to prevent image blur caused by vibration. For long shoots, consider using a gimbal or heavy-duty mount to prevent micro-displacements caused by environmental factors (e.g., airflow across a desk or room temperature changes). The stability of the printer itself is equally critical. Professional-grade units, such as the HeyGears Reflex series 3D printers, are designed with rigid chassis and smooth motion systems. This mechanical stability significantly reduces vibration-induced blur in time-lapse footage, ensuring the subject remains sharp throughout the print job.
- Sensing and Interface Stability: If a trigger is needed to synchronize with the printer, opt for mechanical, photoelectric, or wireless solutions. Keep the trigger logic simple and prioritize stable, repeatable methods.
Software and Automated Workflows
Implementing a shooting plan typically requires a simple yet reliable timing control and data management process. It is recommended to use local storage organized with automatic naming and timestamping to facilitate subsequent frame sequence processing. Post-production tools should support timeline stitching, frame-by-frame export, and colour management. Common workflows involve importing frames into video editing software, setting the appropriate frame rate, and applying color correction and sharpening as needed to achieve a natural, stable viewing experience.
Implementation Steps and Operational Key Points
Step 1: Requirements Confirmation and Solution Design
Clarify the purpose of the time-lapse (internal review, public exhibition, training materials, etc.), and determine the total duration, desired image quality, frame rate, and output format. Based on the dimensions of the printed part, the curing process, and post-processing workflows, establish a shooting schedule and milestones.
Step 2: Scene Setup and Equipment Assembly
Select a stable location free from intense lighting changes and temperature fluctuations. Set up a controlled lighting environment equipped with barn doors, reflectors, and lights with consistent color temperatures. Crucially, ensure your filming lights are UV-free (e.g., LED sources with zero UV emission) or use a yellow/red filter if filming with the printer cover open. This prevents the ambient light from accidentally curing the liquid resin in the vat, which would ruin the print job. Ensure a stable focus and clear field of view between the camera and the printer.
Step 3: Camera Settings and Parameter Optimization
The key to time-lapse is exposure stability and clarity. It is recommended to initially set a low ISO, a small aperture (to increase depth of field), and an appropriate shutter speed to maintain consistent image quality over continuous shooting. If ambient light is unstable, use manual white balance to avoid color temperature drift.
Step 4: Trigger and Synchronization Control
If synchronization with printer movements is required, simple trigger solutions can be adopted, adopt non-intrusive trigger solutions, such as optical sensors detecting the Z-axis movement, or smart cameras with AI detection features, or a time-synchronized intervalometer. The focus is on ensuring timing consistency between the action and the frame capture to avoid skipped frames or duplicate records.
Step 5: Monitoring and Adjustment During Shooting
Conduct test shots in the early stages to check exposure, focus, color, and frame stability. Fine-tune lighting, focus distance, and camera settings based on these observations. Regularly check equipment connections and storage capacity to avoid dropped frames due to hardware failures mid-process.
Step 6: Post-Processing and Final Output
Import the captured frames into editing or compositing software. Adjust the frame rate, color, and contrast, and apply noise reduction and sharpening. Finally, export a high-resolution time-lapse video. If text annotations, arrows, or stage markers are needed, ensure the information is clear without visually cluttering the frame.
Case Studies and Practical Experience
Case 1: Jewelry-Grade Micro-Components
Achieving detailed presentation through high-resolution cameras and directional lighting is paramount here. The focus is on controlling light source stability and highlighting surface finish.
For high-stakes jewelry prototyping, using a printer like the HeyGears Reflex 3D Printer allows for the capture of incredibly intricate geometries. The machine’s precise layer bonding translates beautifully into time-lapse, helping designers visually verify micro-texture reproduction and surface quality evolution, thereby enhancing client trust.
Case 2: Educational Training Demonstrations
Using cost-effective equipment combinations, stable time-lapse effects can be achieved through simple triggers and automated scripts. The priority here is the repeatability of the filming process and the accessibility of teaching materials, allowing students to conduct autonomous learning and practical assessment.
Case 3: Industrial Prototype Process Evaluation
During the curing phase of large-scale modules, time-lapse video reveals the process of interlayer adhesion, stress distribution, and the generation of surface defects. This aids in the rapid iteration of process parameters and quality control.
Safety, Ethics, and Environmental Impact
Safety Essentials
The shooting area must have good ventilation to avoid long-term exposure to volatile chemicals. Use personal protective equipment (PPE) such as masks, goggles, and gloves. Ensure that power supplies, cables, and equipment wiring are tidy to prevent tripping hazards and short circuits.
Environment and Sustainability
Pay attention to the safe disposal of waste liquids, the recycling of light sources and filters, and potential photocatalytic byproducts. Whenever possible, select low-VOC, environmentally friendly materials and post-processing methods to reduce the long-term impact on the work environment.
Summary and Action Roadmap
Operational Checklist
- Define shooting goals and output formats; create a detailed plan.
- Select stable camera and lens configurations; ensure fixed positioning and accurate focus.
- Establish a repeatable lighting environment; maintain consistency in color temperature and exposure.
- Design a simple, reliable synchronization trigger to ensure frame sequence continuity.
- Conduct pre-shoot tests and adjust parameters based on data feedback.
- Complete post-processing to output high-resolution, colour-accurate, and informative content.
- Prioritize safety and environmental management to ensure a healthy and compliant workplace.
Key Conclusion
Time-lapse photography holds significant promotional and educational value in the resin 3D printing sector, but it imposes high demands on equipment stability, lighting control, and post-processing. Achieving high-quality time-lapse videos requires systematic optimization across the entire chain—from material selection, planning, and camera setup to synchronization, editing, and safety compliance.
About the Author


